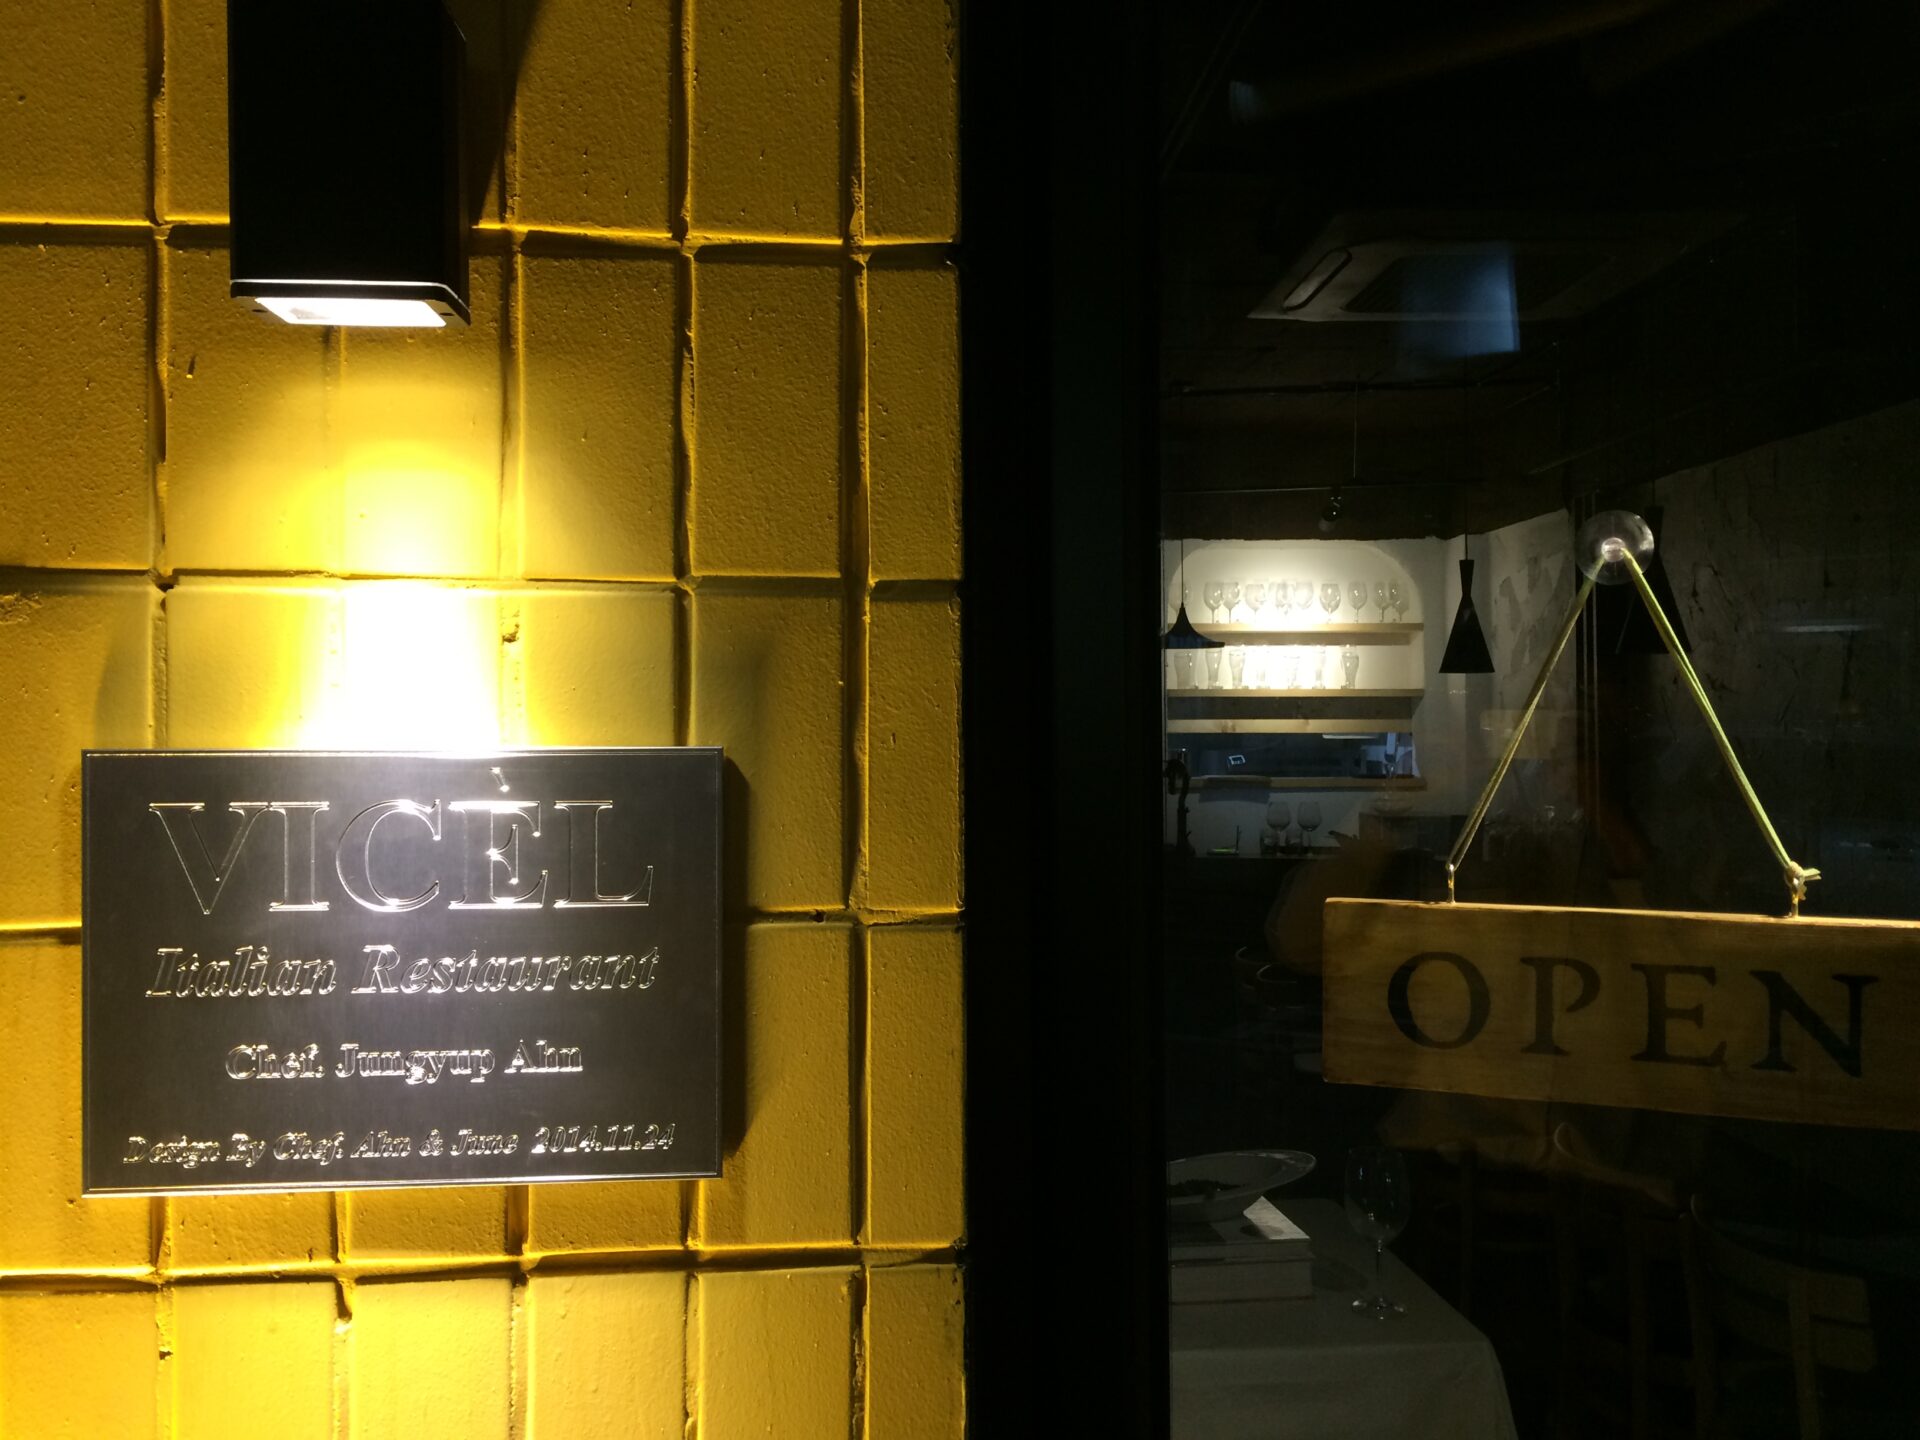
12 years ago, I was working on the interior of ‘Vicel Restaurant‘ with my older brother. During the restaurant’s opening phase, my brother’s first child was born. I watched his gaze grow bolder, and his decision-making became sharp and swift. Looking back, I think that was the reason he took on debt—money he didn’t even have at the time—to make the opening happen.
A Call from New Zealand to Korea
While we were painting the exterior walls of Vitchel, I was nearing the end of my Working Holiday in New Zealand. I had saved up money and was preparing for my final trip before heading back to university. Then, I got a call from my brother.
“Brother, let’s defer your return to school by just one semester.”
At the time, my brother’s plan to start a restaurant seemed a bit reckless. But now, as a father myself, I’ve come to realise that it was the cold, calculated decision of a breadwinner shouldering the weight of life.
From a Storage Room to “Capanno Burger”
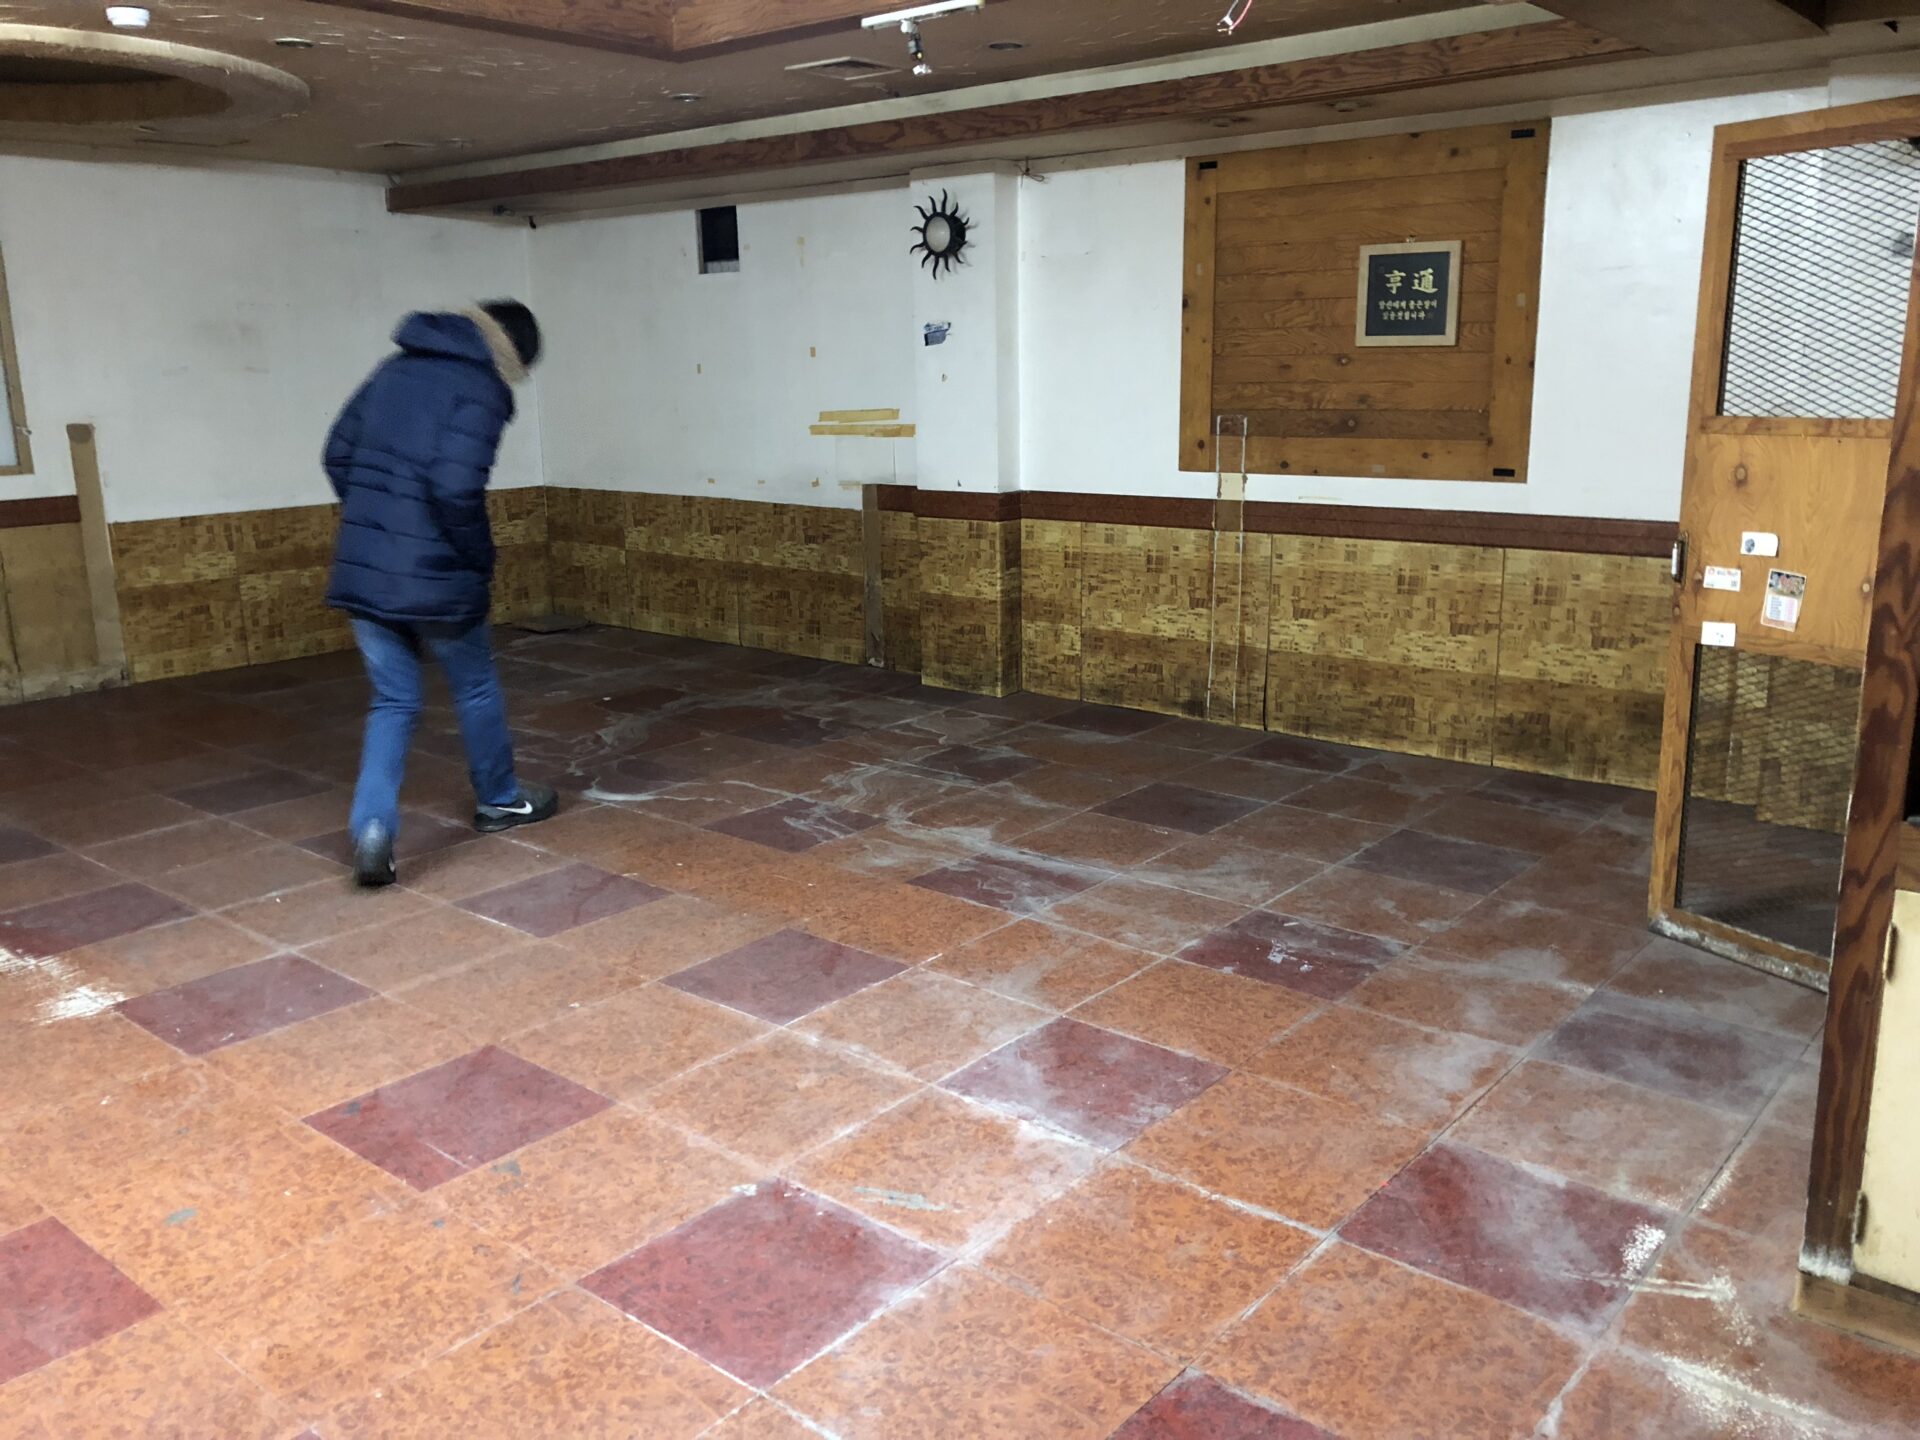
The small 20-square-meter (6-pyeong) Vicel Restaurant in Gangnam Irwon-dong was a 100% DIY project from start to finish. The original space for what would become Grotta Gigante was actually Capanno Burger(Italian style gourmet burger restaurant). It was located in the basement of the same building as Vicel. We had been using it as a storage space before deciding to expand the business. This was 8 years ago today, in February 2018.
The Workflow:
- Detaching fixtures and equipment from walls and ceilings.
- Wall demolition.
- Ceiling demolition.
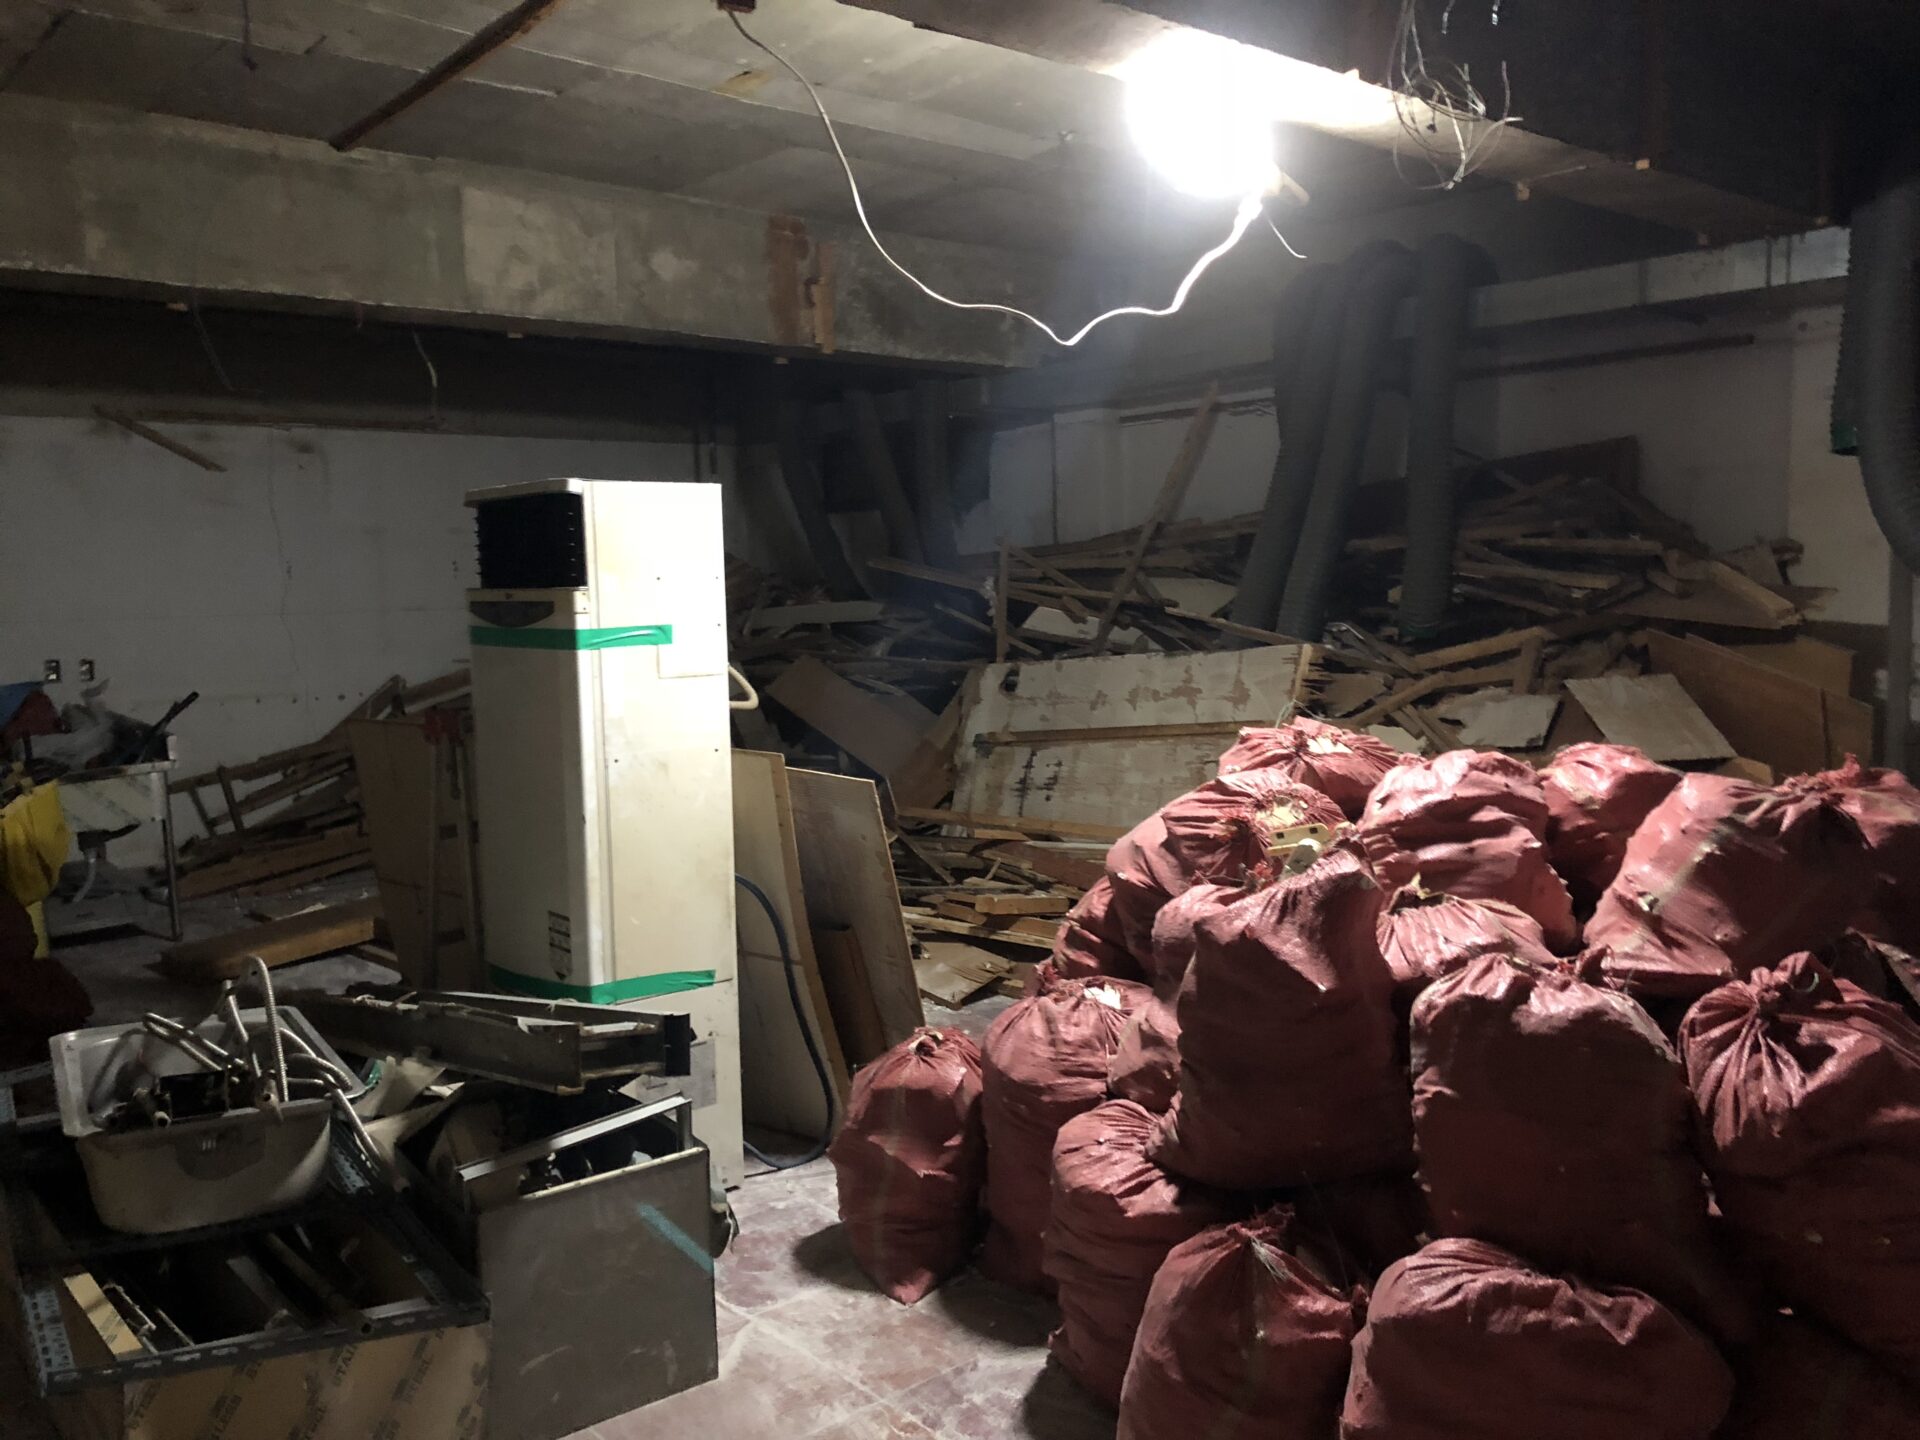
- Bagging the debris.
- Sorting for waste loading.
The Demolistion Process
Based on our experience with Vitchel, we tackled the basement unit as a DIY project as well. Judging by its first appearance, it seemed to have been an old pub.
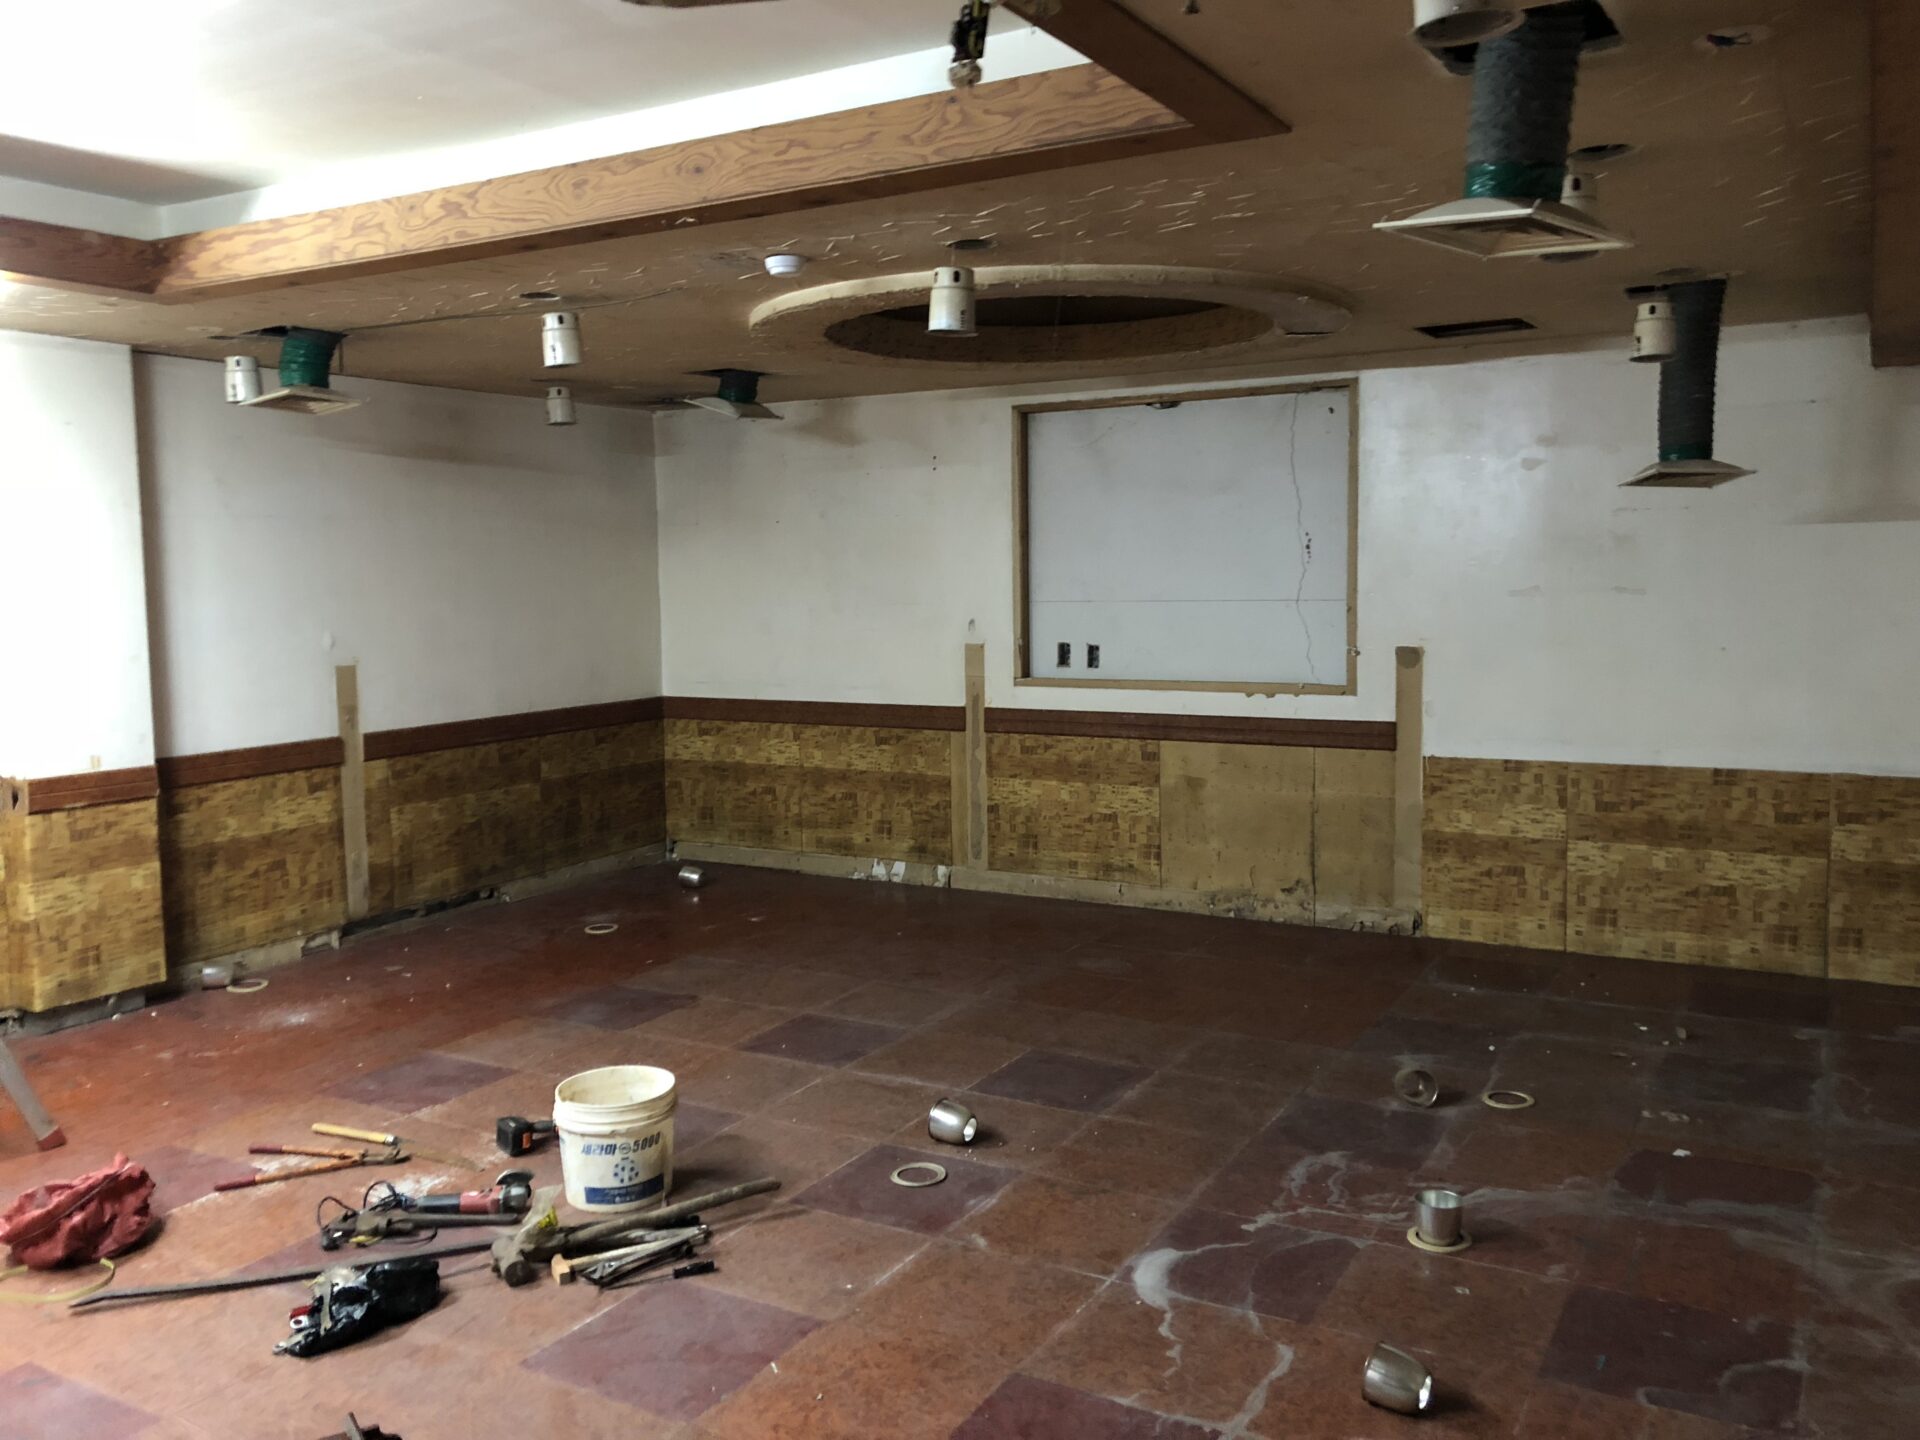
The ceiling was built with timber framing and 3T plywood, while the walls were finished with wooden studs and plasterboard. Clunky brown moldings, checkered deco-tiles, rough putty finishes, and both circular and square recessed ceilings existing at the same time… It was a typical 90s pub interior, though it looked like they had spent a fair bit of money on it back in the day.
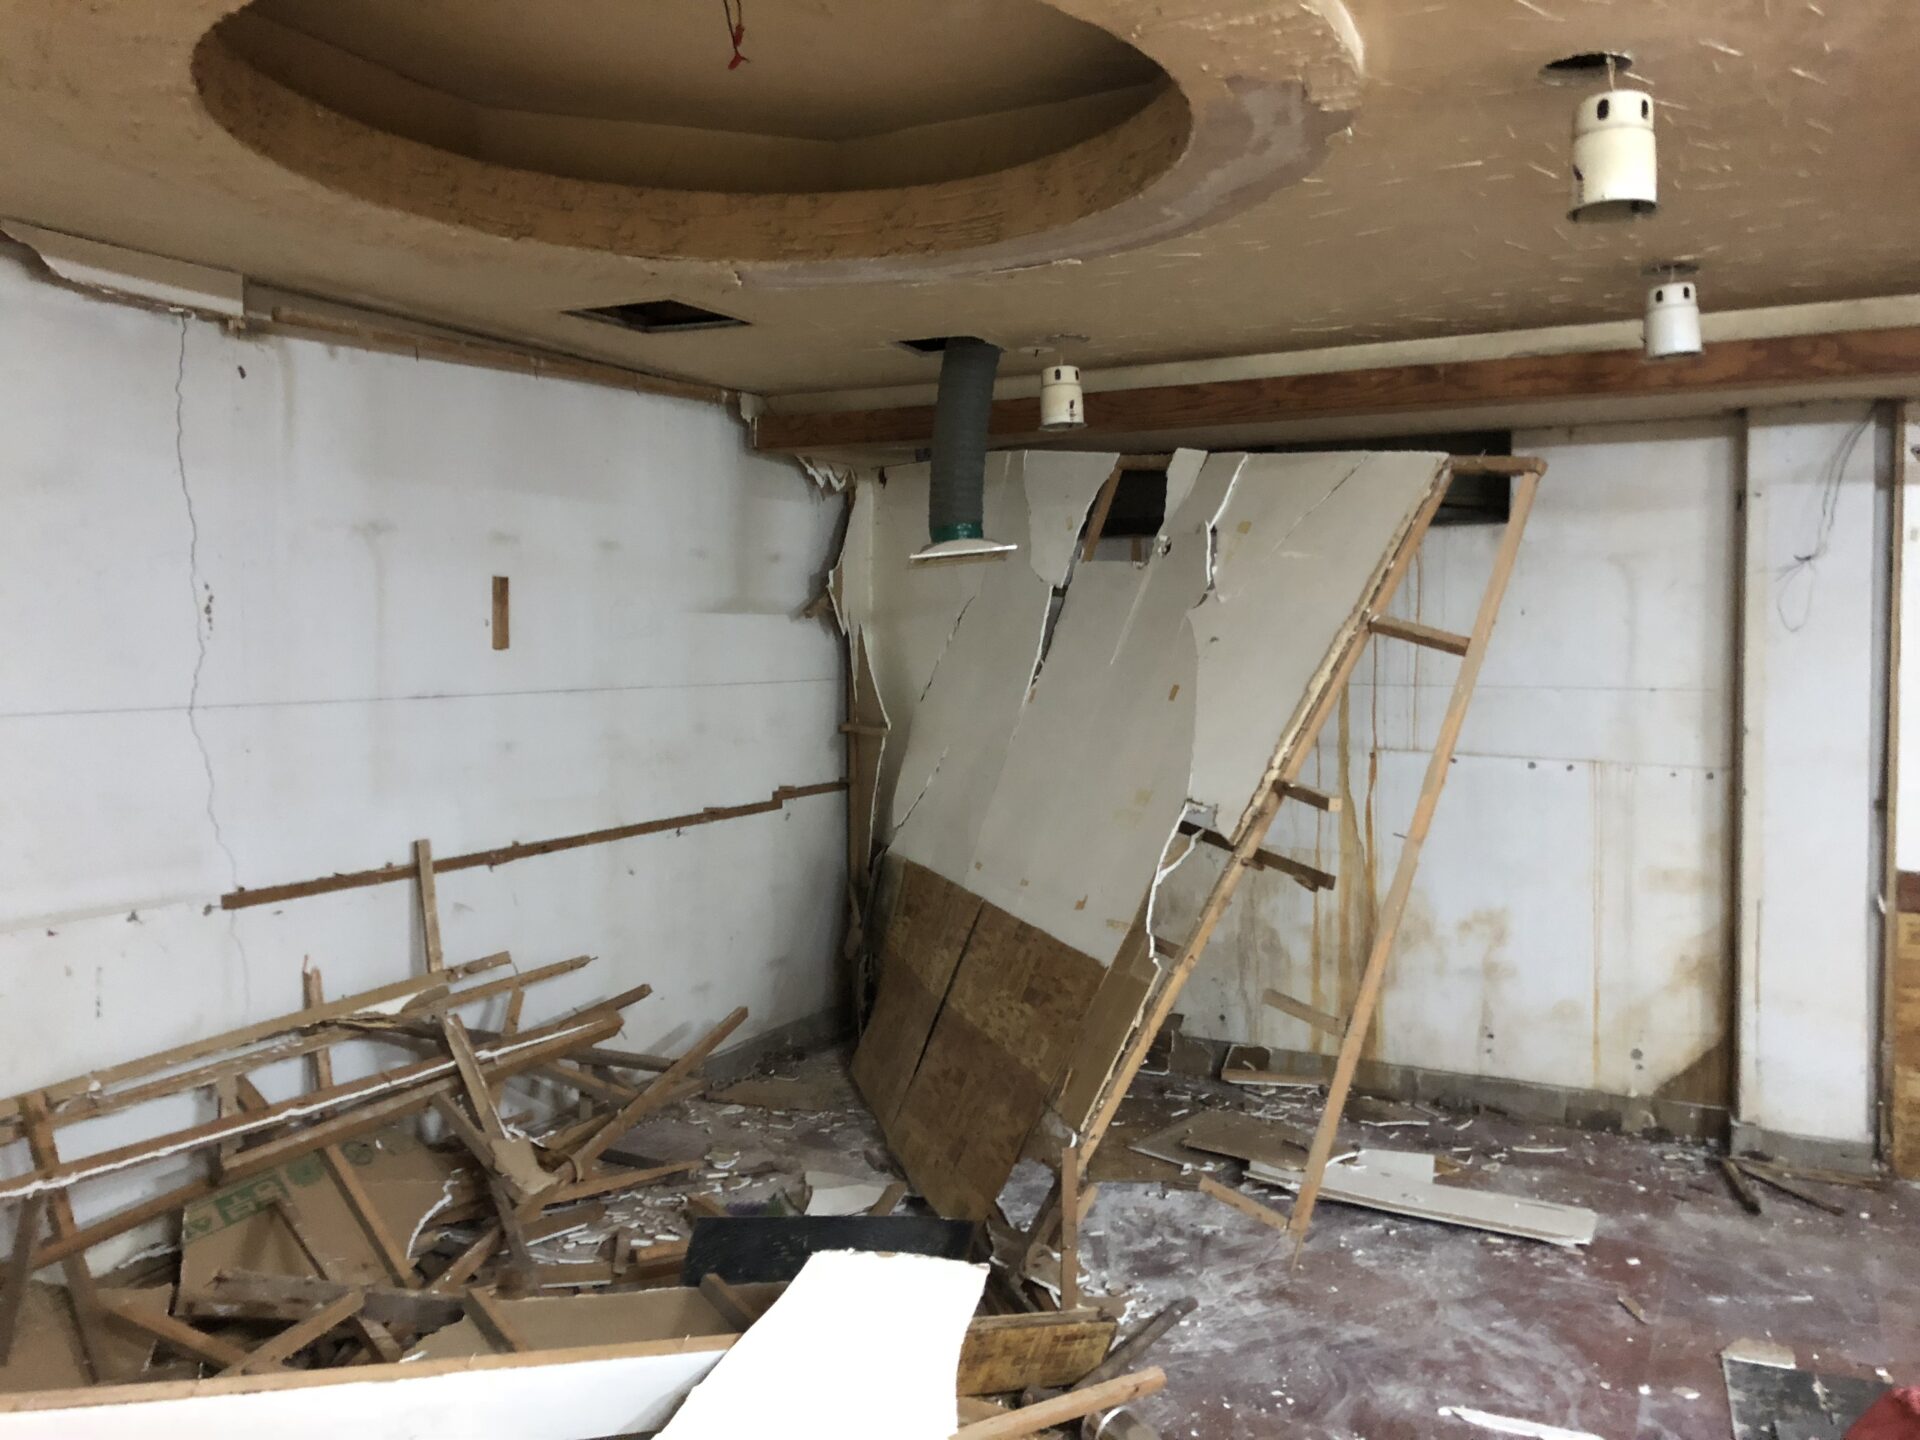
Wall Demolition
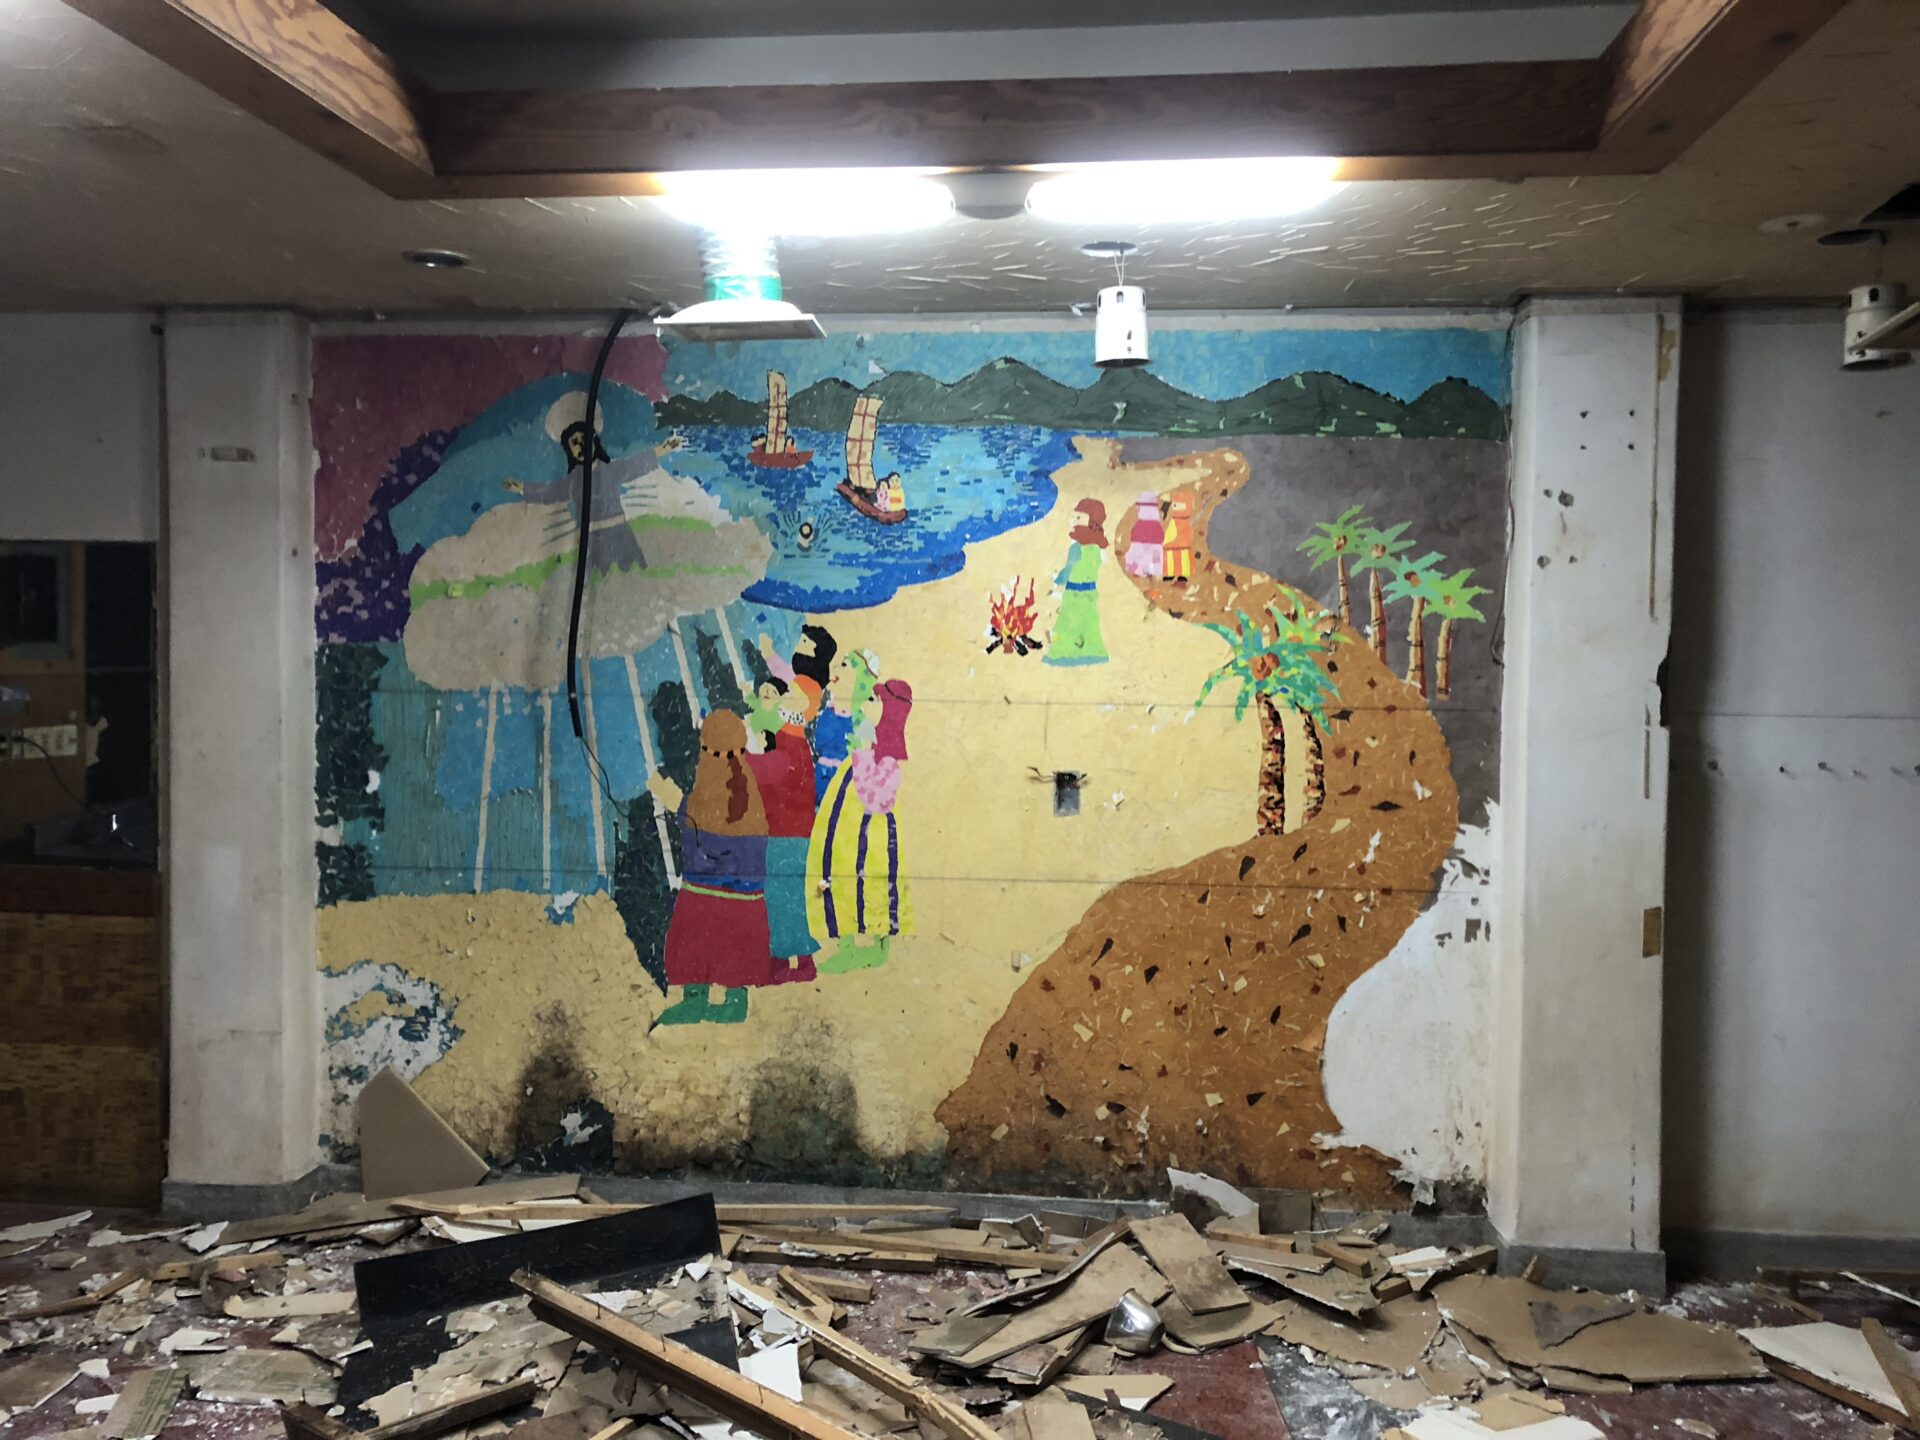
An interesting thing happened: the space right next door was a church. When we tore down the wall, we “excavated” a paper mosaic of Jesus made by the Sunday School children, hidden like a mural. The glue was stubborn and hard to peel off, but I remember feeling a bit conflicted and heavy-hearted while removing the face of Jesus.
To remove the plasterboard, we first cleared away all the small electrical and ventilation fixtures. For this, a power drill, a screwdriver, and a ladder are all you need. Then, we moved on to the walls. A large crowbar (pry bar) was more than enough. Once the walls were down, we broke the debris into smaller pieces and packed them into waste bags.
Ceiling Demolition
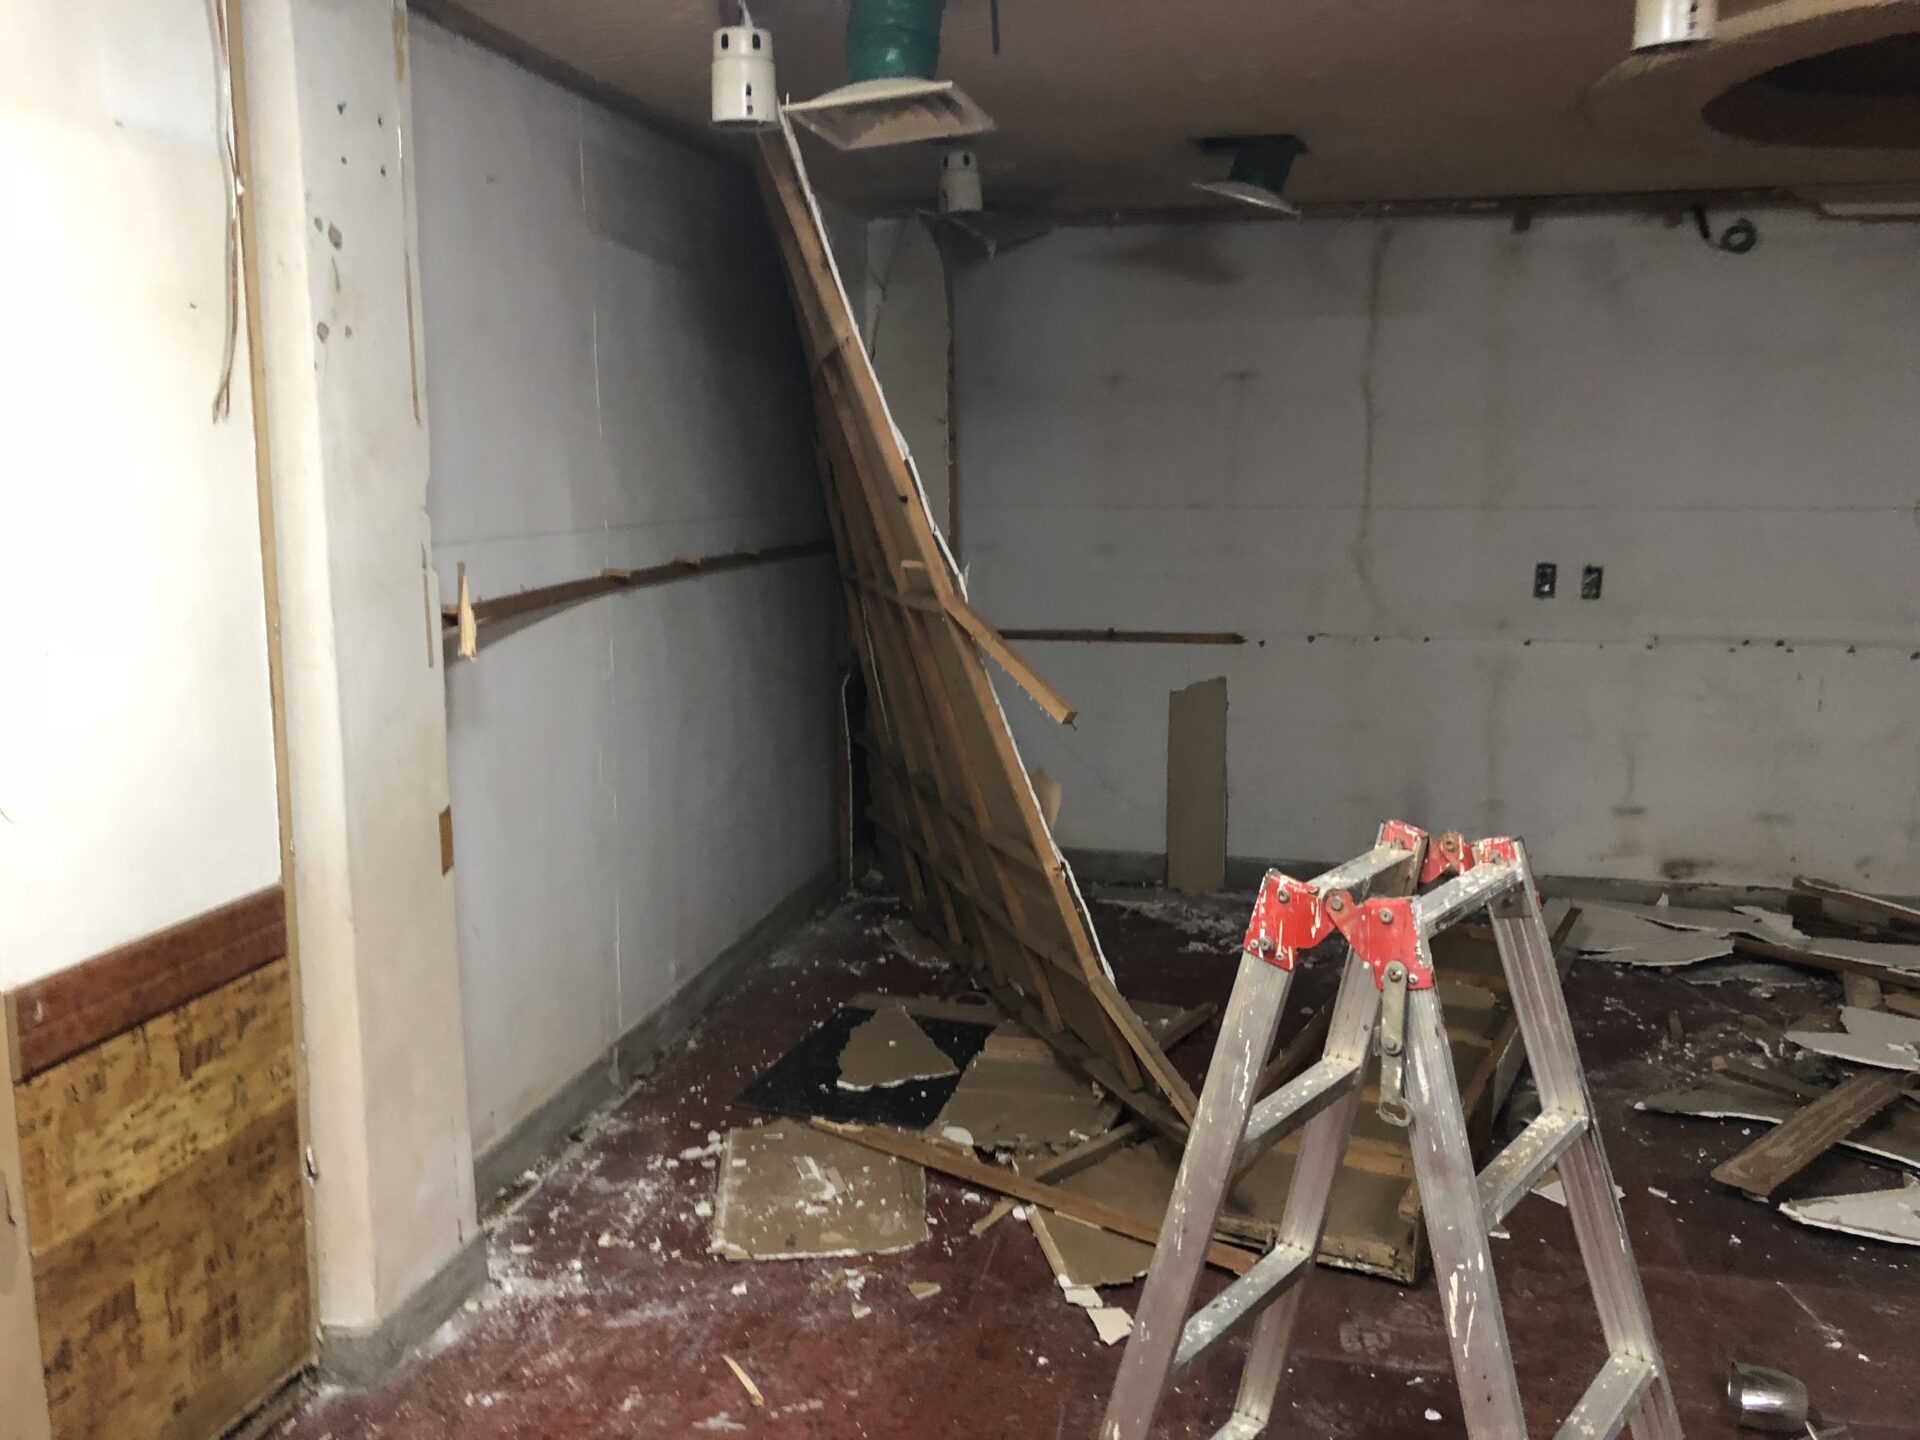
Now for the main event: the ceiling. It’s the “main” part because it’s dangerous. The timber framing for the recessed ceiling was very heavy, so we worked with extreme caution.
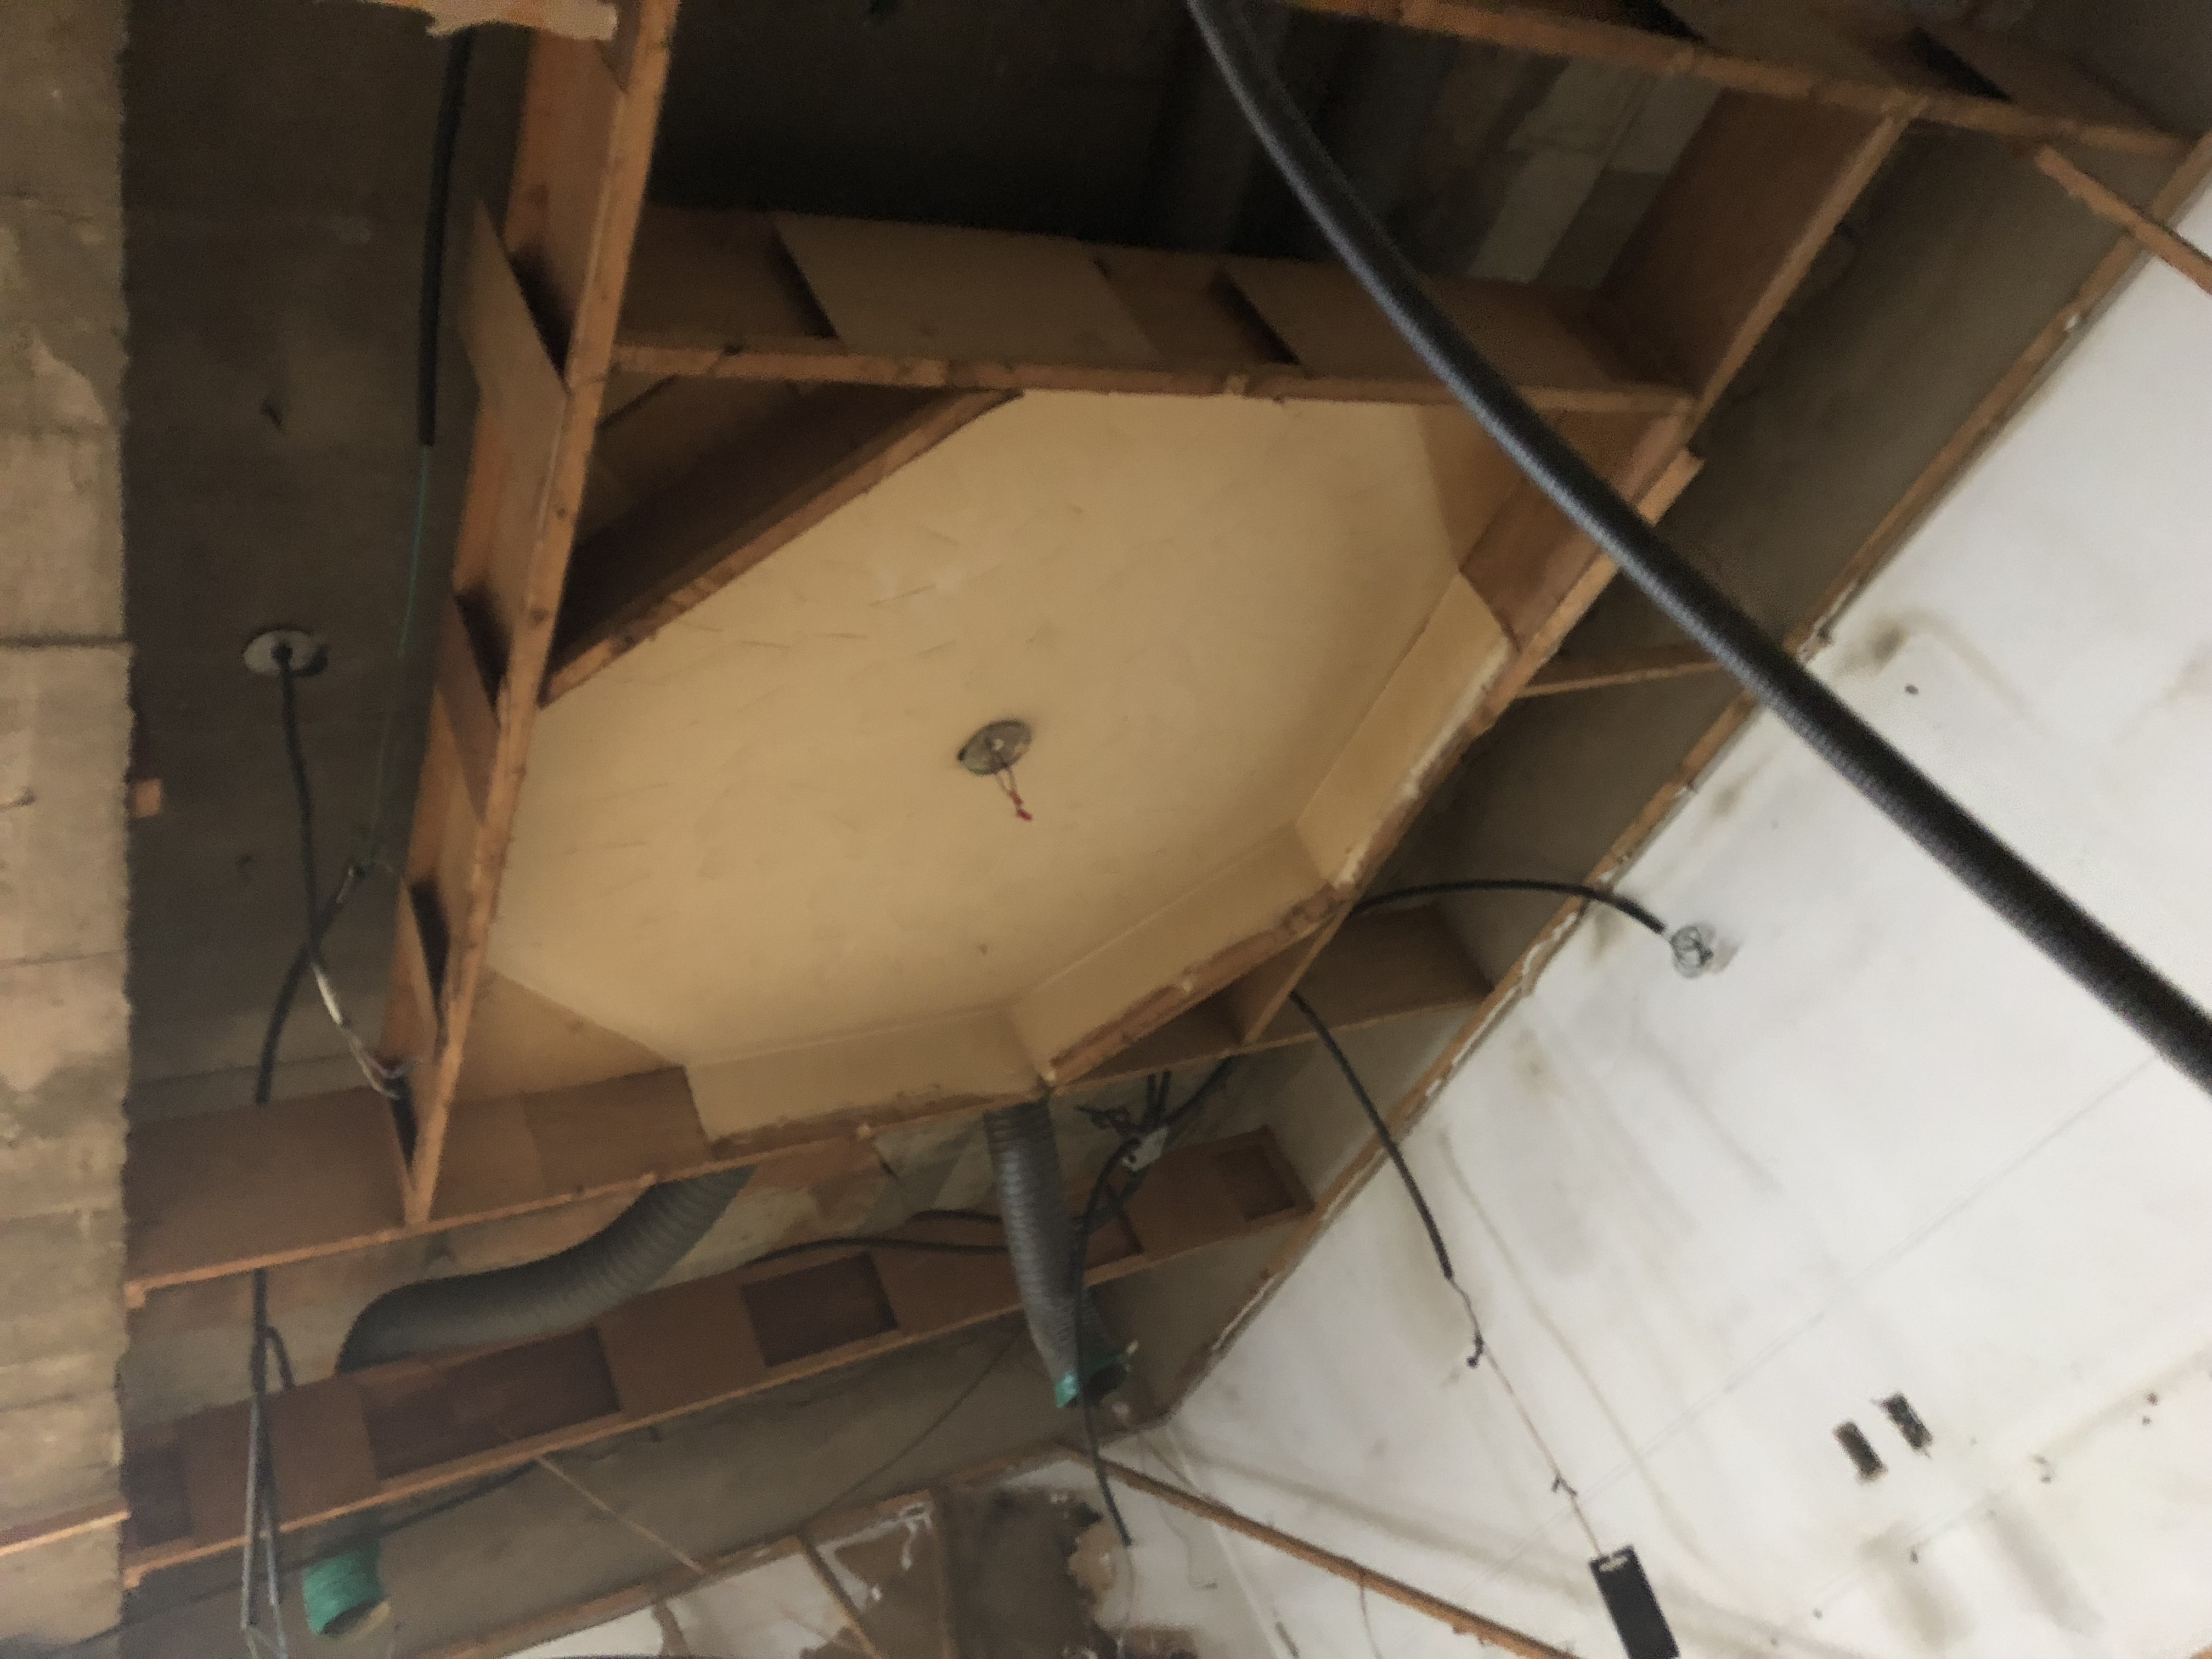
We stripped off everything we could beforehand. Then, we systematically removed the 64-gauge finish nails from the timber studs fixed to the ceiling. This was so that when we gave it a final pull, the structure would collapse while the worker had enough time to jump back out of the way.

Lessons in the Dust
Bagging all the debris is no easy task. Since it was a basement, the dust had nowhere to go, so I made sure to wear a high-quality respirator mask.
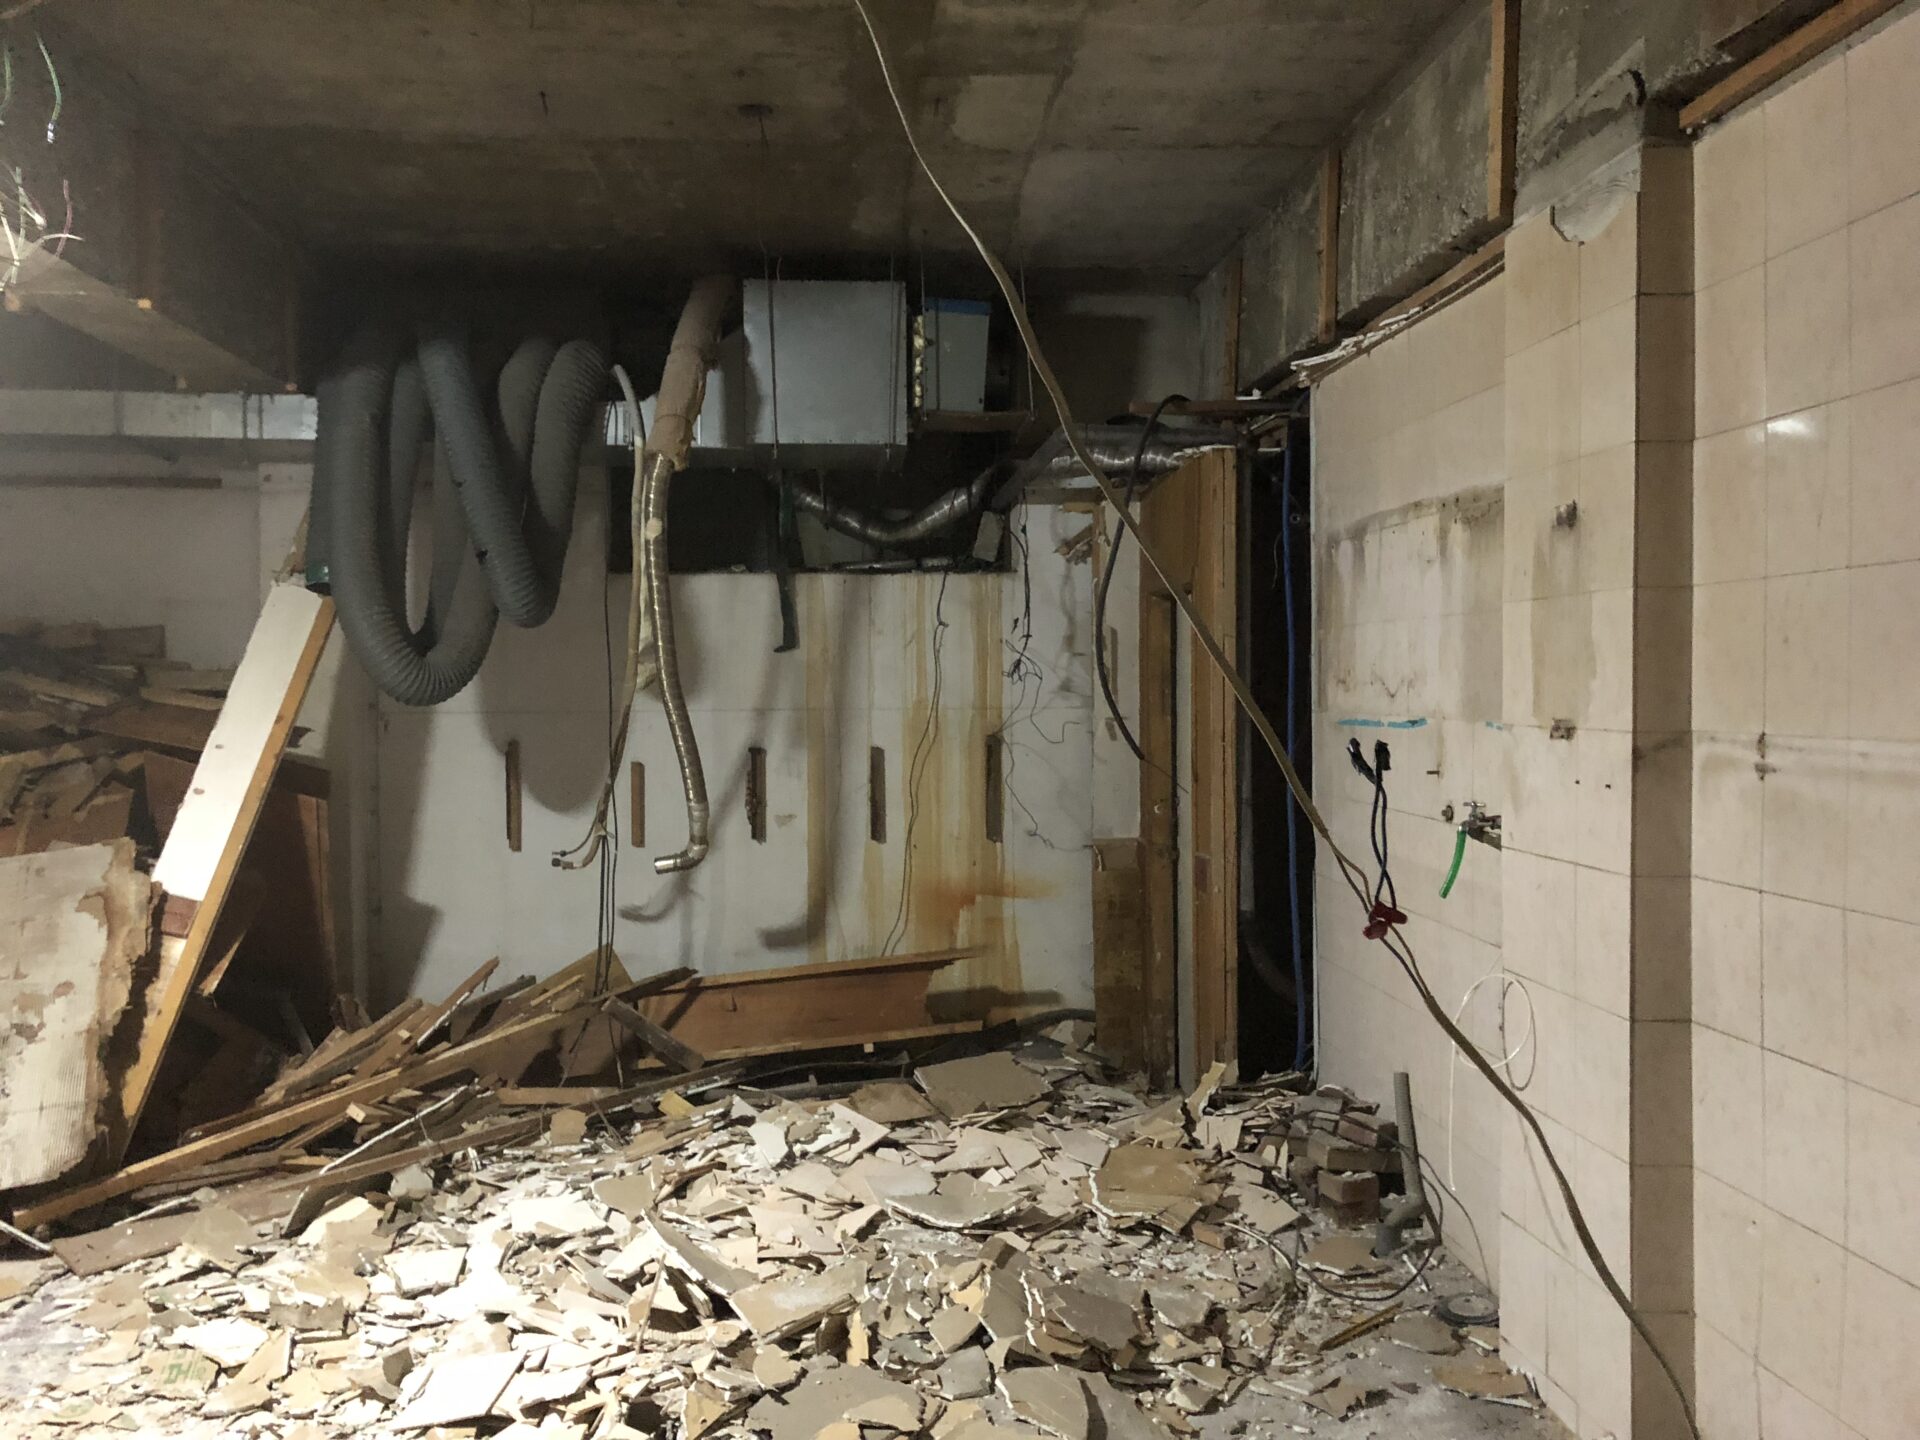
As I tore down the kitchen partition, the tiles came off in heaps. However, the tiles fixed directly to the concrete walls were nearly impossible to budge. I left those for later, cleaned the floor, and filled the bags.
When you engage in repetitive manual labour, you often fall into deep philosophical thoughts. Watching materials fall away so easily during demolition felt strange. It made me think: we are supposed to build the house of our lives upon a rock, yet aren’t we often building on sand, watching it crumble, and rebuilding again and again? But those tiles stuck to the concrete? They wouldn’t move. I found myself hoping that the “house” of our lives would stand on a foundation as stubborn and strong as that concrete. Later, I had to use grinders and various drills to noisily force those tiles off.
Wrapping Up
I cleared out the utilities coming into the space—water pipes, sewage lines, HVAC, and even the boiler flue. Since these would change depending on the new layout, I only focused on disconnecting them for demolition.
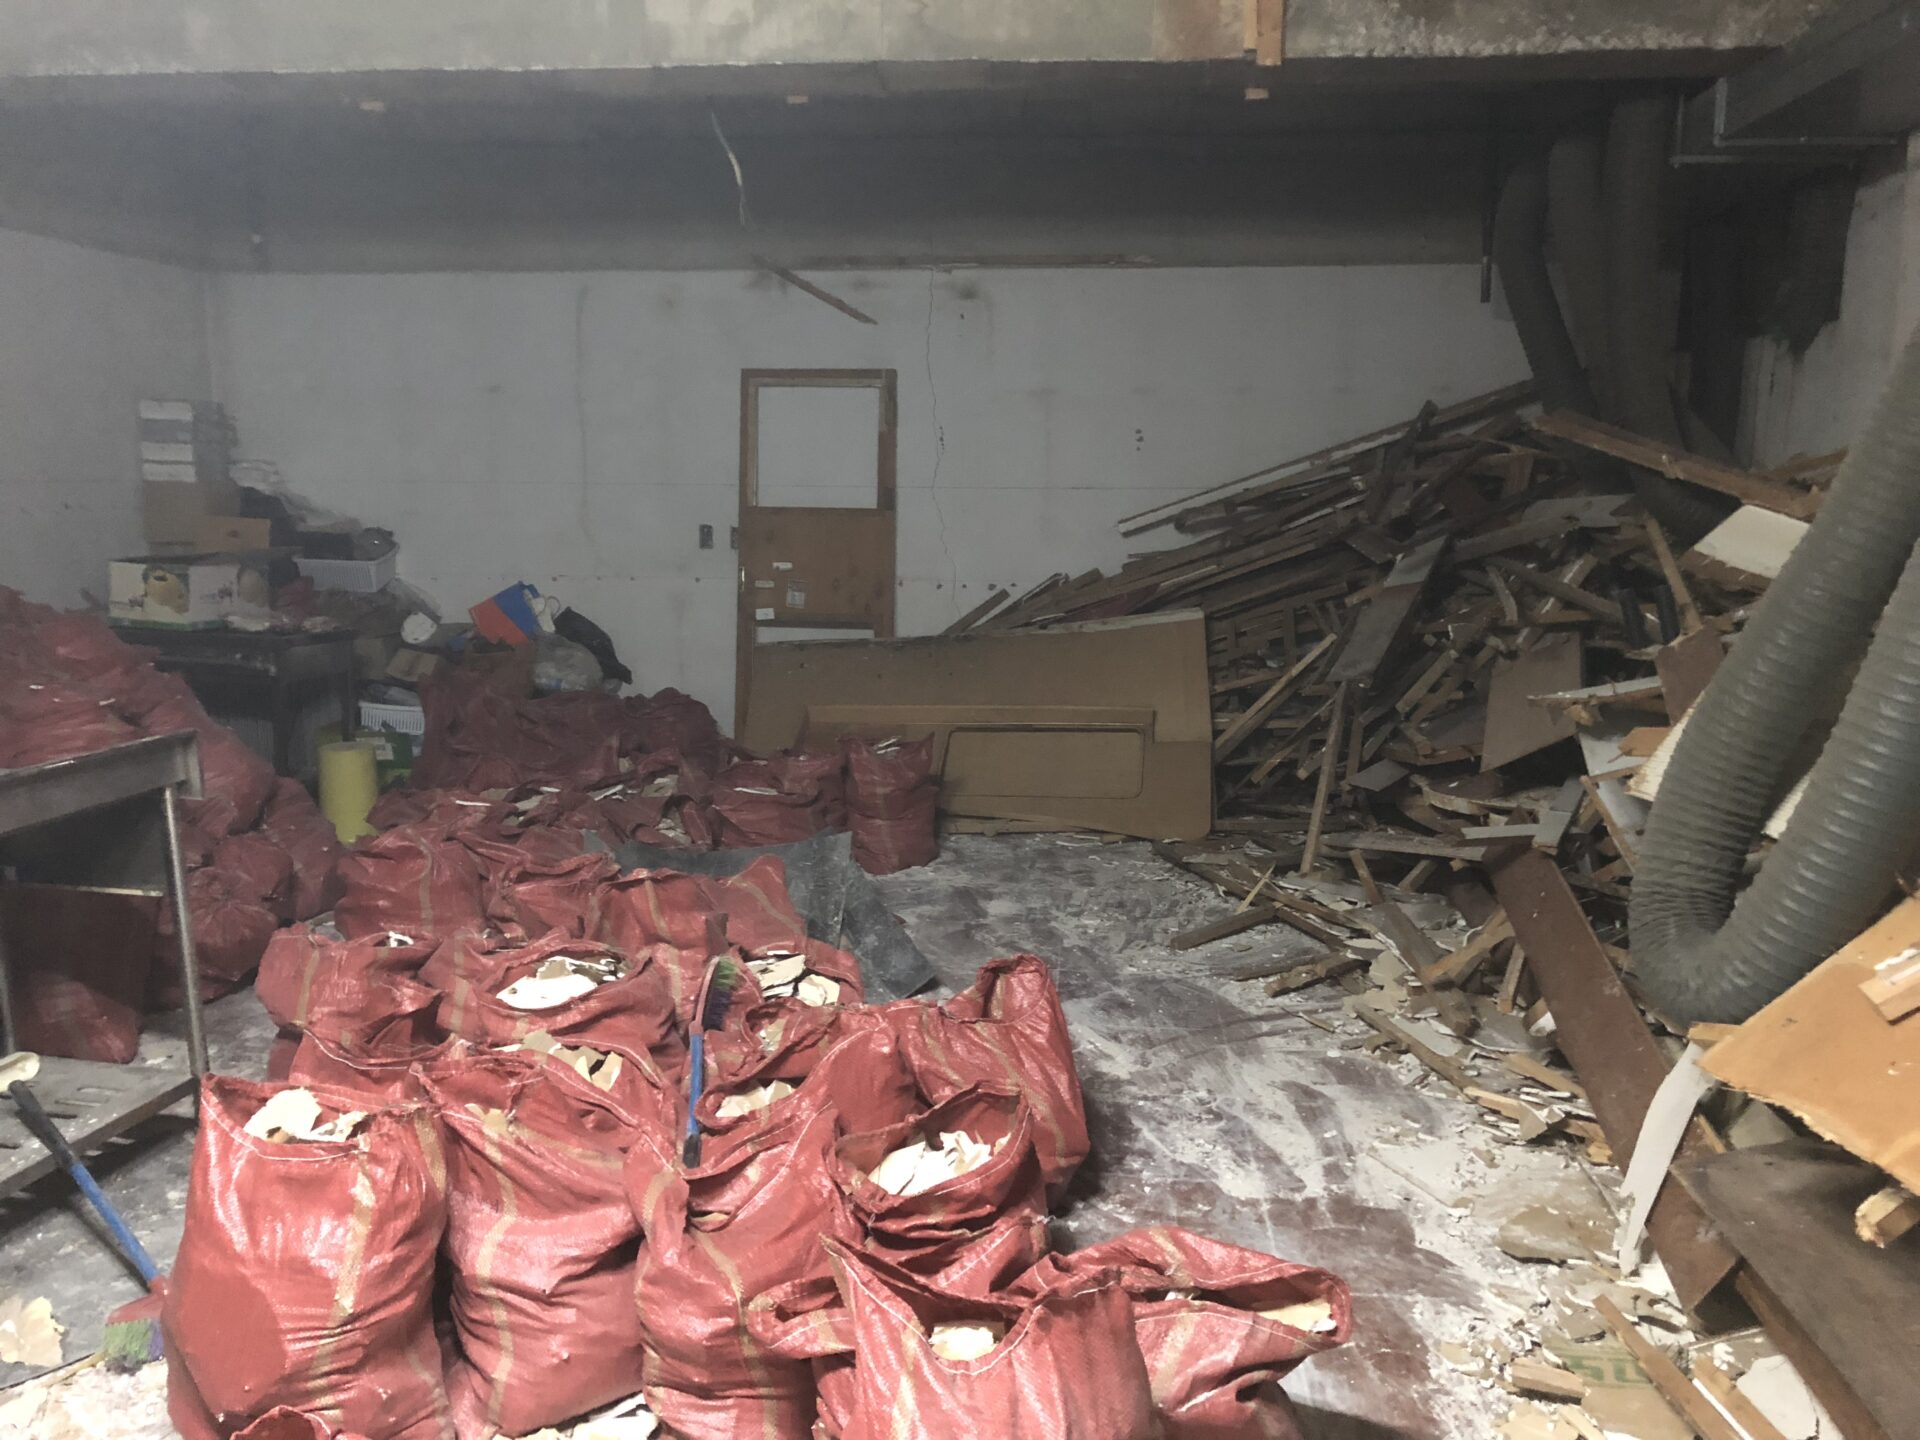
To save on costs for the waste truck the next day, I pre-sorted everything. Waste companies charge less if things are grouped together. You can even get money back for wires or scrap metal if you take them to a scrapyard. I sorted them into: Scrap Metal, Bags (plasterboard/small waste), and Timber.
I finished the day’s prep for tomorrow’s loading and headed home. While my brother was running Vitchel during the day, I worked alone, and he would join me after his shift. It was 11 PM. Tomorrow’s schedule: loading the waste and soaking the floor to remove the deco-tiles.
Looking back, we really had some guts. I remember my brother and I saying many times after this, “From now on, let’s only move into empty shells.” Still, it’s a fond memory full of dreams and anticipation.